

The picture of the girls which I used on our 2012 Christmas Card was a big hit with the friends and family and everyone loved seeing Florence peeking through the letter O. (It was Keith's genius idea to move her to that spot after she insisted on holding her letter up in front of her face). Lots of people asked me how I made the letters so I thought I would give you an insight into my foolhardy creative process and pass on what I learned. I suggest you get started now if you want your own set for next Christmas rather than waiting until three weeks before the big day like I did!
I first saw the idea for the letters on the blog Oh Happy Day, loved it and pinned it with a note to myself to make a Noël sign for Christmas in place of the original Bonjour. Whilst trying to come up with some cute way to photograph the girls for the Christmas card photo I suddenly realized that each girl could hold a letter giving the card a suitably French flavour. If I had known then how long it would take to make the letters I would have stopped there. It ended up being a much more fiddly project than I expected, but I do love the end result so I'm glad I persevered.
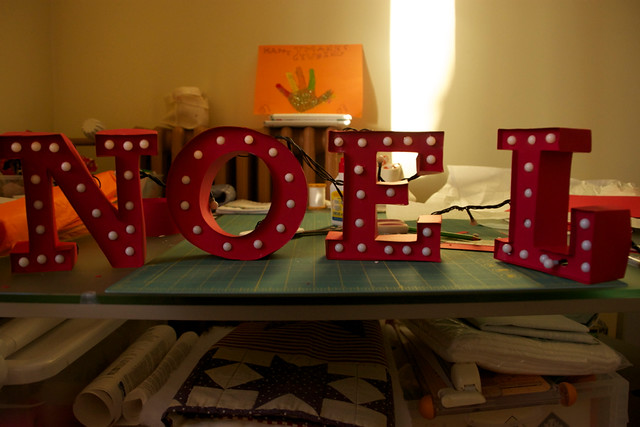
The tutorial is very clear and it helps if you also check out the instructions from the large Movie marquee sign also on Oh Happy Day. I was lucky enough to find mini globe lights in Habitat and decided to make the letters with red card as I could see spray painting them as the tutorial suggests, with all that was going on in our house, would be bound to end in tears, not to mention the fact that the choice of craft supplies in France is fairly limited. I got all my supplies from Truffaut, France's one stop garden and craft centre.
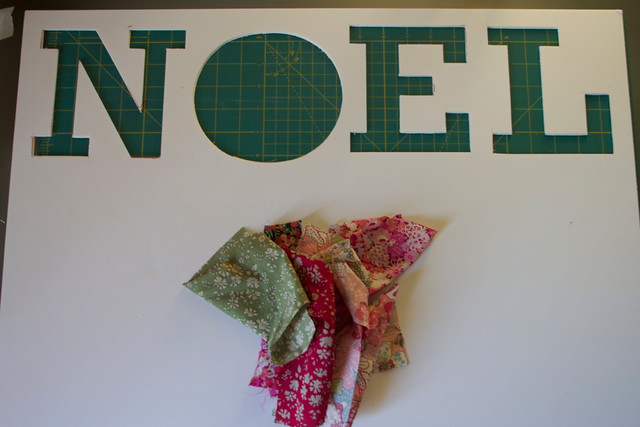
The tutorial comes with a free downloadable alphabet, but after I cut out the letters I needed I realized that they were going to be too small for what I had in mind. Cue much despair and tearing out of hair. After reading through the tutorial's comments though, I figured out that the original letters were made using the font Rockwell which is thankfully installed on my computer. I created my own N, O, E & L stencils by enlarging the font to 700pt and then making them outline only to save ink. (Format>Font>Outline if you're working in Pages on a Mac like me). Once I had my red card letters cut out I started punching holes for the lights and quickly came to the conclusion that the weight of my lights was going to be too much for cardstock alone if the letters were going to survive a photo shoot and a toddler. After a not so quick trip back to Truffaut for some foamcore I stuck my cardstock letters to it and cut them out with my Exacto knife, leaving me with this rather pleasing negative that decorated my sewing room for the rest of the season.
It was now time to create the holes for the lights and this was when the project got really hard! The holes have to be big enough for the lights to go through but somehow not so big that they fall straight back out again. After a lot of trial and error, I found that the best way was to cut out a small square with the Exacto knife and then enlarge it by pushing a Sharpie pen through the hole to get the diameter I needed. This took the best part of a Sunday afternoon. In retrospect, drilling the holes might have been better but that would have required more technical set up than I could be bothered with at the time.
Once the holes were made all I had left to do was to glue the frames around them. I had expected this to be the hardest part of the whole project, but after the faff of the holes it was surprisingly straightforward. Accurate measuring and careful scoring is essential though. I couldn't get hold of Tacky Glue here in France but I found another quick drying PVA glue that worked fine for me. I wouldn't recommend using hot glue for this step as it doesn't give you enough time to work and will leave a lumpy look to the edges of the letters.
One last tip if you want to photograph the lights, turn your camera to manual if you can. The photo above was taken on automatic. The little lights are on but the exposure kills them. After stumbling across this tutorial on Pinterest I was inspired to really play around with the 'correct' exposure - overexposing to make the lights glow. The shot that made it onto the Christmas card was taken at f/4, 1/40, ISO1600.
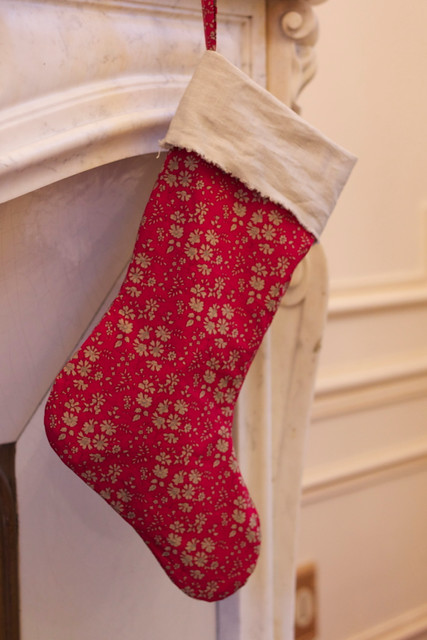
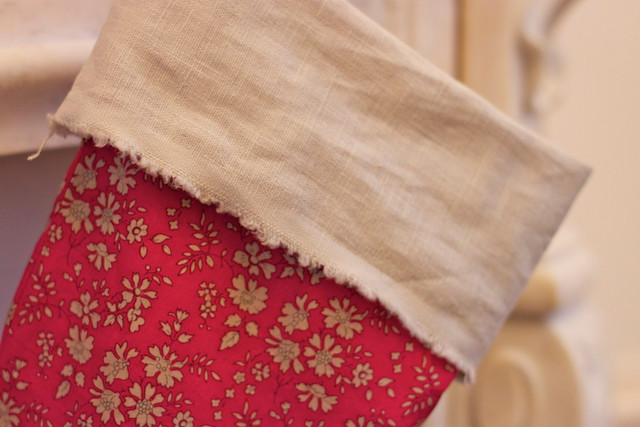
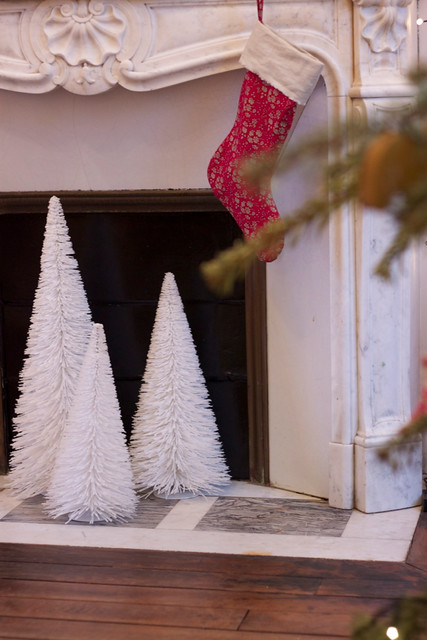
I made it using this Purl Bee tutorial and some Liberty and linen from my stash. It was a tough choice between these fabrics and some Anna Maria Horner velveteen, but in the end the deep red Liberty and French linen won. Bought for two completely different projects, these fabrics were meant to be together. The colours match perfectly and they feel delicious. Instead of hemming the cuff, I left the selvedge on the linen to give a fluffy cozy feel and this time I'm happy with how the stocking turned out.
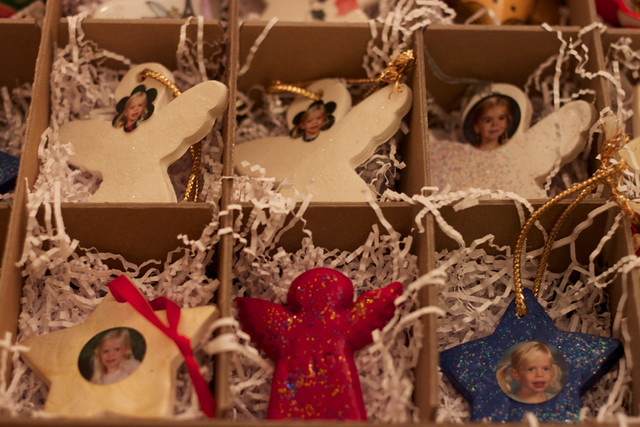
Another memory I'm already looking forward to unpacking next year is this red clay angel. Florence made it for us at her French Halte Garderie and it perfectly matches my treasured collection of clay angels that all the other girls made while they were in pre-school in California. We have another crafter in the family and the glitter all over the floor to prove it!
You were adventuresome, with all of the other things going on (and four kids)
ReplyDeleteAmbitious project! Well done you! Turned out so great. xoKaren
ReplyDelete